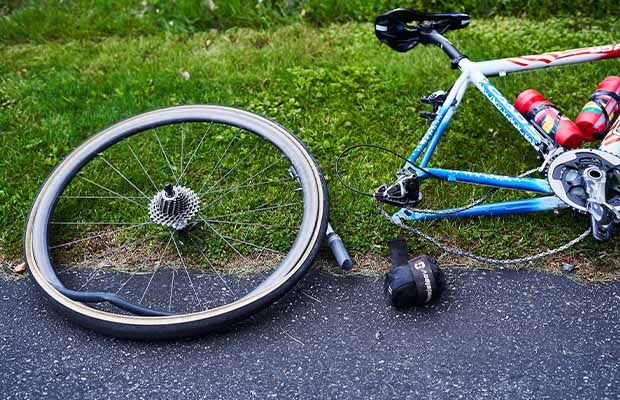
Experienced cyclists know punctures occur frequently, so it’s important to learn how to change a bike tire even if you are a more casual cyclist. It’s possible for you to fix a punctured bike tire on your own. The tire may need to be replaced, though, if the damage is too severe or it is already very worn.
Follow the instructions below to learn how to change a bicycle tire if you need a refresher, are new to cycling, or are starting out with bike maintenance.
Table of Contents
Before You Start
Put the bike on its side or upside down and rest it on the handlebars to access the tire. However, some cyclists steer clear of doing so because doing so could harm the handlebars or seat. Pick the posture that makes you feel most at ease. Purchasing an upright bike stand that can lift the bicycle off the ground while you work is an additional option. Make sure the chain side is facing up if you’re laying the bike on its side.
Setting the gears to the smallest ring beforehand will help you remove the back tire more easily if you need to replace it. The bicycle’s outer gear is the smallest ring.

How To Change A Bike Tire?
1. First, Ensure The Tyre Is Unfolded
If the tire is not brand-new, this is a good time to examine both its condition and the condition of the rim.
Safe running and future punctures can be avoided by replacing a worn-out tire or rim tape.
Before patching or replacing the tube and reinstalling the tyre if you need to replace a tyre due to a puncture, make sure you identify and remove the culprit (the object that caused the puncture).
To make it simpler to apply the first bead when the tire is brand-new, it is a good idea to “massage” the tire into a vaguely rounded shape.
2. With The Tyre Properly Shaped, Install One Bead Of The Tyre Onto The Rim
Make sure to install your tire in the proper orientation for best performance if it has directional tread. This is typically indicated on the sidewalls of the tires.
In most cases, you won’t need any tools to get the first bead onto the rim because you can lift the entire tire over the edge of the rim with your palms rather than your thumbs, though in rare cases you might need to use a tire lever to pull it over.
Installing tyres with the name label centered above the valve not only looks good in our opinion, but it also places important information, such as tyre size and minimum/maximum inflation pressures, above the valve where it can be easily viewed while inflating the tyre.
3. Install The Inner Tube Or Tubeless Valve
If using an inner tube, fill it with air before putting it on. By doing this, the tube will be less likely to be pinched by the tyre bead during tyre installation.
To prevent the tyre beads from falling into the deepest section of the central channel of the rim, avoid adding too much air. Doing so will cause the tube to occupy an excessive amount of space inside the tire. There should be more than enough air to give the inner tube a basic shape.
Added pro tip: if you’re using latex inner tubes, lightly dusting the inner tube with talcum powder will help keep it from adhering to the rim or tire walls or becoming entangled in the tyre bead. The possibility of pinching the tube during installation may be further decreased as a result.
4. Begin Installing The Other Tyre Bead Onto The Rim
Starting opposite the valve, slowly work your way around each side of the rim, leaving the final unmounted portion in the center of the valve.
As you proceed, make sure that both of the tire’s beads drop into the rim’s central channel.
When using tubeless tires and rims, the newly installed bead may occasionally sit on the rim shelf rather than slipping into the central channel, reducing the amount of slack in the bead. Simply use your thumbs to push the tire bead into the channel.
5. Install The Final Part Of The Tyre Bead Onto The Rim
Usually, things start to get challenging at this point.
When you reach the last portion of the bead, roll both sides of the bead over the rim edge piece by piece while pulling the entire tire up with your palms of your hands.
The bead can be pushed over the rim edge with your thumbs, but if the combination is particularly tight, you’ll probably just end up with sore thumbs.
When using very thin or wide tires, which make it difficult to grasp the entire tire in the palms of your hands, you might have to resort to using your thumbs to push the tire sidewall over the edge. Wearing safety gloves in these circumstances is advised.
If you’re having trouble, go around the rim again and make sure that the installed tyre beads (on both sides) have all dropped into the central channel of the rim. The last portion of the bead must be attached with the least amount of fuss, so this is absolutely essential.
If at all possible, install the remaining tire bead without using any tools, as improper use of tyre levers and other similar tools may result in damage to the rim, inner tube, or rim tape.
However, with careful tool use, you can pull the final portion of a tight tire bead onto the rim if installing the remaining tire bead by hand is not possible. We’ll talk more about that later.
6. Check The Tyre Is Correctly Installed, Then Inflate
Check the inner tube (if you’re using one) around the rim to make sure it isn’t being pinched or squashed under the tyre bead. If it is, simply lift the tire up in that spot to release the tube, allowing it to rebound back into the center of the tire.
Make sure the tyre beads are positioned on either side of the valve if tubeless valves are being used with tubeless-ready tires, and be sure to secure the valve stem retaining nut to the opposite end of the valve.
You can pump up the tire once you’re confident that both tyre beads are properly positioned around the entire circumference of the wheel. We have information on finding the ideal mountain bike tyre pressure as well as a guide to finding the right tyre pressure for your road bike.
Tips For Installing Tight Bike Tyres
The best installation advice we can offer is to practice installing tough tires until you get it right.
When you’re outside, far from home, and attempting to fix a puncture with cold hands, the more comfortable you are with the proper technique, the simpler it will be.
However, there will undoubtedly be instances when you have to turn to specialized tools, such as tire levers or tyre bead seating tools.
Of course, there is no shame in this. Being able to install tires without using any tools is not particularly impressive.
It doesn’t matter where you set up your bike—at home, on a roadside shoulder, or on a trail—as long as you can do it quickly and safely.
Glove
When installing tires, a good grip and protection for your hands are both essential. Joe Norledge / Immediate Media
Your hands can be shielded from friction and strain with the aid of sturdy workshop gloves.
Additionally, if you’re working in hot conditions or have sweaty palms, they can make grabbing a handful of tires securely a little bit easier.
Tyre Levers
Every cyclist should carry tire levers while riding (often in a saddle bag), as they can be extremely helpful in coaxing the final section of a tight tyre bead onto a rim. When removing a tire, they are also very helpful.
Use a single tire lever to raise a small portion of the bead onto the rim while maintaining the position of the other side of the tire on the rim. Continue installing beads until every last one is in place.
Don’t attempt to lift the remaining bead over in one motion by beginning in the middle of it. That will definitely result in a broken tire lever and a lot of cursing.
Additionally, when using tyre levers, take care not to nick or otherwise harm the rim tape, especially if they have been used a lot.
Most of the best tire levers are made of durable plastic and have wide, strong, and thin tips. We prefer Pedro’s tire levers, but any tools of a similar design should work.
In general, metal tyre levers should be avoided, especially if you have carbon rims, as these can harm your rims.
The Tyre Glider and the Crankbrothers Speedier Lever are two examples of contemporary evolutions of the basic tire lever.
These are designed to continuously install the bead as you push them around the rim edge. Both tools also have a more conventional scooped edge to help remove tires.
Similar in size and weight to conventional tyre levers, they are also convenient for storing in a saddle bag or jersey pocket.
Tyre Bead-seating Tools
When installing tight tyres, specialized tyre-seating tools like Kool Stop’s Tyre Jack (and comparable gadgets made by other brands) can save you a ton of hassle.
The tool’s hinged portion extends over the tyre and hooks onto the tyre bead while the rigid portion rests on the rim’s edge. The bead can then be lifted up and over the rim edge.
Our experience has shown that these tools work incredibly well for quickly and easily putting stubbornly tight tires on rims. The only drawback is that they are frequently too large to fit in a saddle bag or jersey pocket for use on the road.
They are typically lightweight enough to be transported in hydration packs, cycling backpacks, or bikepacking bags.
Therefore, if you know you might have trouble replacing your tyres after a puncture, a bead-seating tool might be a sensible piece of equipment to bring on an adventure or long mountain bike ride.
Soapy Water
In order to make it easier for the tyre bead to slide over the edge of the rim when installing tubeless tires, some soapy water can be used to lubricate the interface between the rim and the tire.
When using inner tubes, it is not worthwhile to try this technique because a wet tube could stick to the inside of a tyre and potentially cause a puncture.
Warm Water
Tom Marvin, technical editor for BikeRadar, suggests warming up tough, brand-new mountain bike tires in warm water for a few minutes to make them a little more malleable.
The rubber and tyre carcass should have sufficiently softened after warming up for you to more easily shape the tire and install the first bead onto a rim.
Tubeless Tyre Plugs
As was previously mentioned, mounting tubeless tires can frequently be more challenging than mounting clinchers of equal size.
This is why fixing a tubeless puncture with a tire plug can frequently save you from having to take the tyre bead off the rim while you’re away from home.
We recommend two kits: Muc-Off’s Stealth Tubeless Puncture Plug set and Stan’s NoTubes DART tubeless repair kit.
Although tubeless tyre plugs are typically the BikeRadar team’s first choice for fixing flat tires, we still advise carrying a spare tube or two as a backup.
Final Thoughts
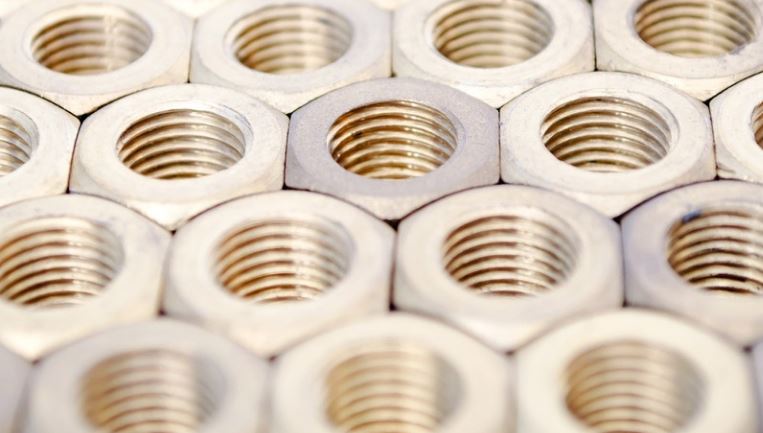
Over the course of years of ownership, regular bicycle maintenance and safe storage can help keep a bike in top condition. To prevent bending a bike’s wheel, always replace or fix damaged tires as soon as you can. Keep track of all small parts, such as nuts, lock rings, or valve caps, during the repair or replacement process. Even though they are small, they serve a crucial function for the bicycle, so losing one during a repair can lead to another issue that must be fixed before the bike can be used again.
Read More: How To Inflate Bike Tire?